Introduction
In my previous post I showed how we turned a Raspberry Pi into a digital display device by installing a Video Looper application. Now let’s take a look at how to fill that display with content. First, do yourself a favor and read fellow writer Leanne Mobley’s wonderful post on design resources for librarians. She provides a great overview of tools out there that can add some polish do your content and provide a starting point.
The focus of this post is how I used Microsoft PowerPoint to create the content for our Digital Displays. I went with PowerPoint as it met two major requirements: low cost and user familiarity. Like most projects I create, my aim is to be able to hand this off to another user and bring them up to speed quickly. By going with a program that is available on every system on lab, it reduced the headache of transferring licenses or vetting software that is platform neutral; as we have users on Mac OS and Windows. Additionally, there are tons of resources available online that can introduce users to PowerPoint, cover advanced topics, and a robust reference/support site.
With that said I’ll look at:
- Availability – What versions of PowerPoint have export and where to get it.
- Templates – Why they are important and how to create them.
- Working in PowerPoint – Covering simple one slide movies and how to utilize animations to bring your video to life.
- Raspberry Pi – Geared towards those using the Video Looper technique I covered in my previous post.
- Fine Tuning – The importance of viewing on end device and being okay with tinkering.
Availability
 While I do love that Raspberry Pi holds onto the dream of Libre Office, as this was my primary writing program while college, by now the Microsoft Office Suite has become the de facto productivity package, so most users should have access to a version of it. In order for this project to work you would need to have access to at least PowerPoint 2007, as this is when the video creation option was introduced. Unfortunately, PowerPoint web users (available through Office 365) will not have the video creation option.
Templates
Benefits
Creating a new video from scratch each time can seem like a daunting task. Indeed, the first batch of videos can take up hours of your day. To reduce this added stress, I opt to create templates for each video category I have. In addition to making it easier to update for each new video, templates also allow your videos to maintain a consistent look, which is great for extending your existing branding. If your library or institution has a style guide, I highly recommend sticking to it to help reduce the amount of work.
For example, here is the New Book template I use:
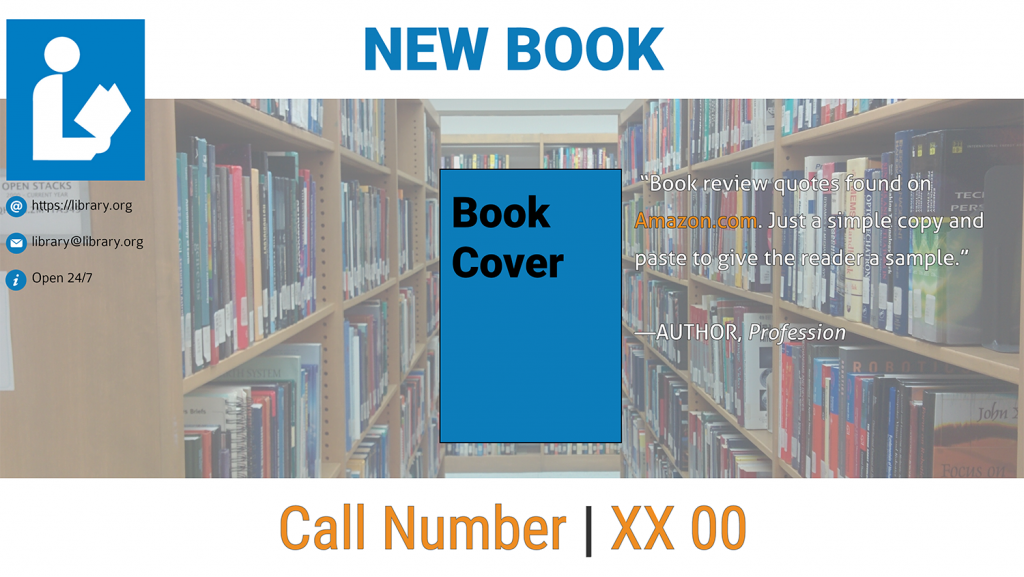
It contains library information that remains static; the book cover and call number which are the most prominent features; and, to add some animation, I have book review quotes slide in every 20 seconds. The entire movie lasts one minute, which is plenty of time to digest each quote and not completely annoy patrons.
Creation
I use LucidPress.com to create my templates, but really any design program or even PowerPoint itself can be used. The templates just need to be:
- Easily imported into PowerPoint
- Editable text and image areas
- Configured to house static information
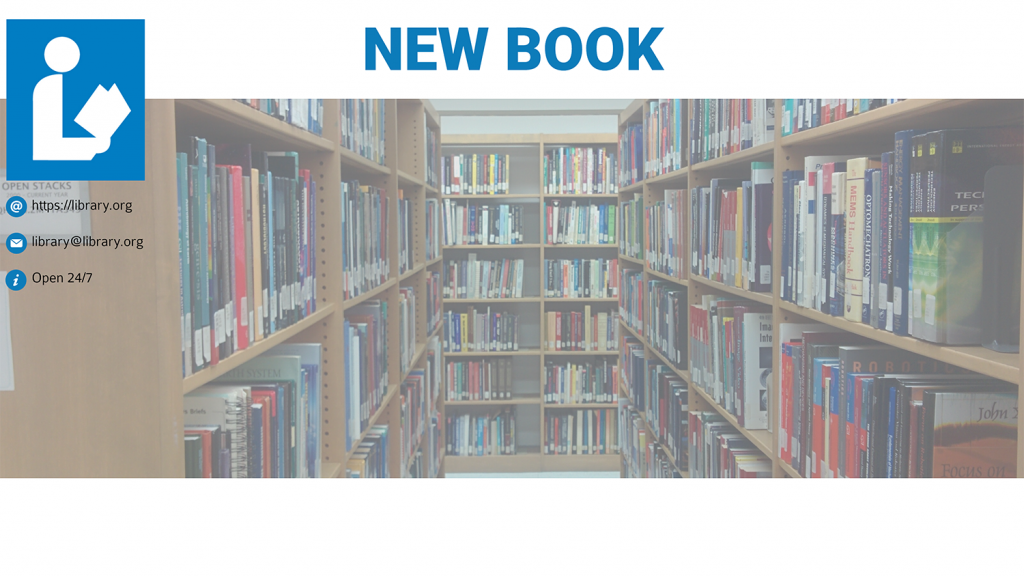
The reason for #1, is that I like to make each template the background image of a slide. I have LucidPress export the template as a PNG and then, in PowerPoint, set that PNG as the slide background. Going back to the New Books movie, here is the background image I use.
For #2, we want the template to do the heavy lifting. It needs to show where the customized text boxes and images should go. Here is a workflow that works for me:
- Repurpose: Start with a flyer from previous iteration of the category, such as a past event. This will give you a great starting point, as you will not have a blank page mocking your efforts.
- Scrape the need-to-know information of category and try out a few placements and ideas. I clump bits of info together and move them around, while keeping the main image as centered as possible to keep it as the focal point.
- Aim for a template that has as few editable sections as possible; when you have +5 areas you need to update for each new video, you really aren’t saving that much time with a template. Going back to the New Book template, for every new book I only have three sections to update: Book Cover, Review Quotes, and Call Number. It took me an hour to create the template and takes about five minutes to create a video for a new book. The template should let the user easily know where the custom text and image areas are.

Finally, #3 is about on making use of static information areas as this is the best way to utilize a template. For example, each of my templates has a section where I list the library’s Name, Website, and Email. This is partially done for branding purposes but it also prevents the slide from being too empty. With this static info in place I don’t have to shy from just using a single image and block of text. Additionally, static information can also include color schemes and category headers, which makes it much easier when figuring out how the rest of the image should look. Reuse any content that makes your job easier and lets users know that all of the slides in this video are connected.
Example

Working in PowerPoint
Video Creation
What we want to do is have PowerPoint create an MPEG4 of the presentation, complete with timings and animations. If you already have a presentation that you think is ready for the big screen, you can try it out by simply:
- Click File
- Export
- Create a Video
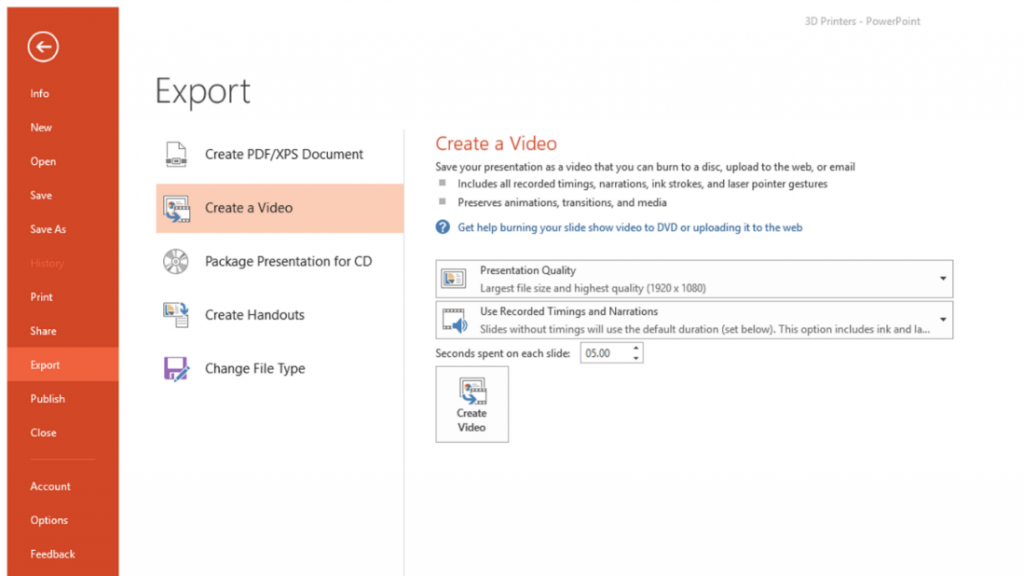
PowerPoint will then create the video and save it to the selected directory. Depending on your computer’s processing power and the length of the presentation, you might want to give it a few minutes to process. Just keep an eye on the progress bar at the bottom of the screen and do not close PowerPoint before it completes.
![]()
Basic – Single Image Video
For simple displays, such as an event flyer, you can get away with making a single slide presentation with a set display time. Keeping things simple makes it much easier to update the slide for every new event. Pick images and titles that let you slim down the description. Did I mention Leanne’s design resources post is a great starting off point? Definitely check it out for places to find those eye-catching images and color schemes. Since I am using the generic library logo, I went with a simplistic color scheme for this Upcoming Event template:
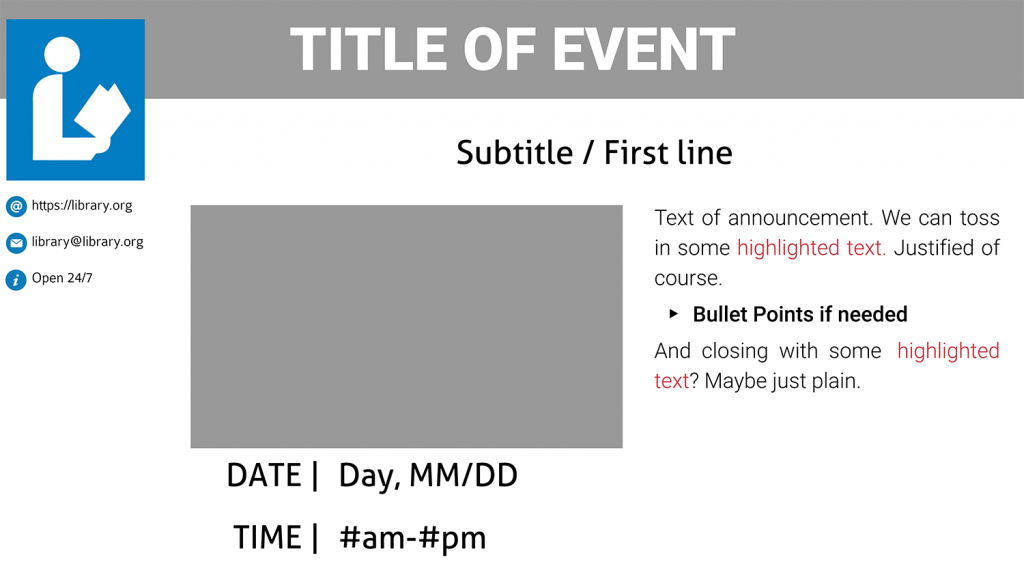
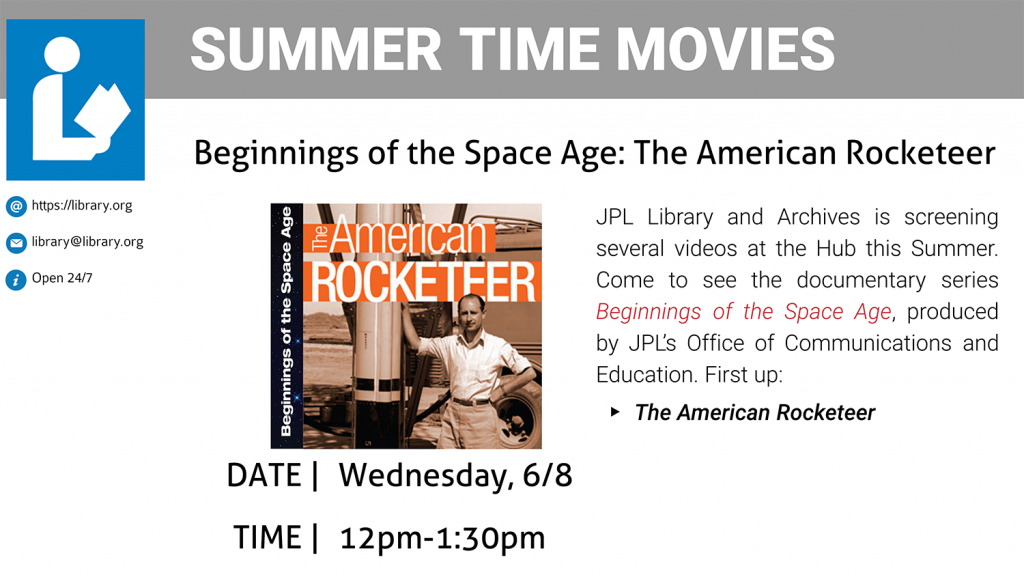
As you can see, it has slots for just the facts; title, brief description, date, and time. I try to design flyers that are easily digestible. Here is the filled in template.
For these basic videos we can leave it as a one slide presentation and have it display for one minute. To do this:
- Click File
- Export
- Create a Video
- Adjust the adjust the Seconds Spent on Each Slide option to 60.
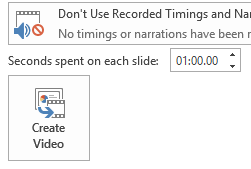
- Adjust the adjust the Seconds Spent on Each Slide option to 60.
- Create Video
The end result is a static 1-minute upcoming event flyer.
Animated
For videos that need to display a large amount of information, take advantage of PowerPoint’s animations and slides transitions. It can be a simple text box appearing after 20 seconds. Going back to the New Book template, I have each quote in a separate Text Box. Each box is set to appear for 20 seconds and disappear when a new one appears. This can be done by:
- Opening both the Animation Pane and Selection Pane. This makes it easier to select items:
- Animation Pane: Animation Tab -> Advanced Animation -> Animation Pane
- Selection Pane: Home Tab -> Editing -> Select -> Selection Pane
- Select Textbox 1
- Animation Tab -> Add Animation -> Appear
- In the options panel, found in the Animation Pane, select Start After Previous
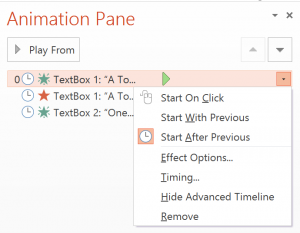
- In the same options panel select Timing… and for Delay insert 3 seconds, or whatever you want the initial delay to be.
- In the options panel, found in the Animation Pane, select Start After Previous
- Select Textbox 1
- Add Animation -> Disappear
- In the options panel select Start After Previous
- In the same options panel select Timing… and for Delay insert 20 seconds. This will make Textbox 1 disappear after 20 seconds.
- Select Textbox 2
- Add Animation -> Appear
- The file is now ready for video creation
- File -> Export -> Create a Video
- Adjust the adjust the Seconds Spent on Each Slide option to 1 minute.
- Click Create Video
- File -> Export -> Create a Video
The end result is a 1 minute video with two textbox that appear 3 seconds and 23 seconds into the movie.
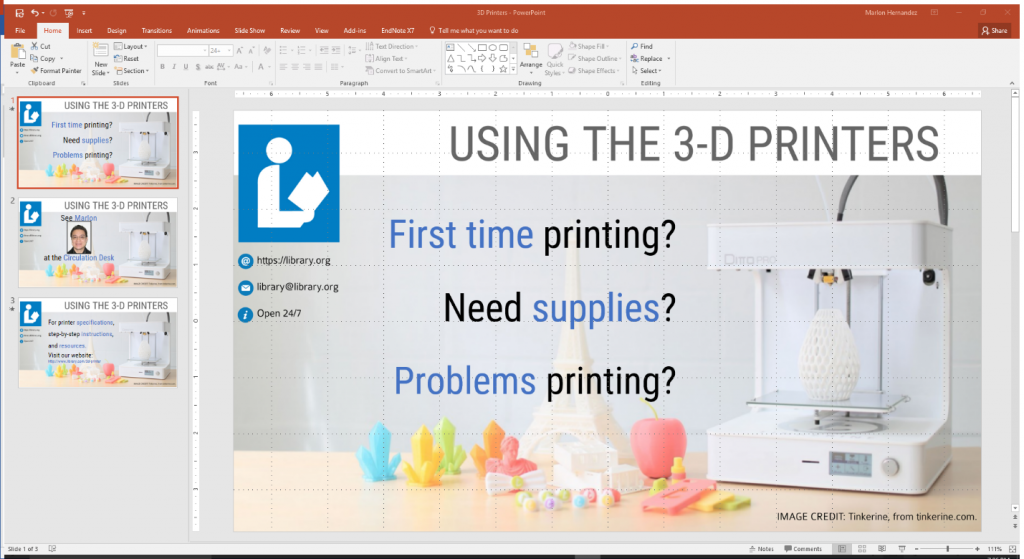
I use this technique to create videos that have multiple slides with varying bits of information on each slide, such as a How To for the 3D Printers or general information, like service desks available in the area and their hours of operation. As I said before, any flyer can be turned into a movie.
Raspberry Pi
Once you have your video all ready to go it is simply a matter of loading it onto a USB stick and starting up the Raspberry Pi. The Pi will detect the videos and play as usual. The Video Looper plays the videos in alphabetical order, you can use this to your advantage by using a file naming scheme to sets up the videos in a particular order. For example, I go with:
- 01 – General – Welcome
- 01 – New Book – Name of Book
- 02 – Event – Summer Movie
- 02 – New Book – Name of Book
As you can imagine, with that naming scheme the videos play in the exact order. This was particularly useful when the archives wanted to display three videos back to back.
Fine tuning
Finally, I have some words of advice culled from creating videos for the past few months.
Try it out, at least once. You won’t know how the video will turn out until you actually see it on the end device. I’ve had videos that look amazing on my laptop only to have the video show up with wonky colors or screwy text sizes. Before you throw out the video or mark it as done, load it up and even edited it on the fly while watching the video on the big screen.
Don’t be afraid to test out variations, even with a single change. This is similar to the first but you should not wait until you have a finished product. I have around 5 different versions of my “Welcome to…” videos that have large changes, such as fonts and colors, or just even a single line of text. I am not wedded to any video being the “Final” version and that is okay. It is an iterative process.
Listen to patrons and notice their movements. Like most user experience books teach us: it is valuable to see how your patrons interact with your displays. Some patrons will be vocal about the videos being too distracting, it is how I figured out I should avoid videos that last less than a minute. Others will simply continue to glance up at the screen at every video change, while it is great that they notice the videos it can also be a sign that it is distracting them from their work.
Thank you
Well that wraps up this two post look at how to create a Digital Display on a Budget. I hope there were at least a few takeaways for you.
This is also my final post for the LITA Blog, it has been an absolute pleasure sharing some of my experiences and projects. I’d like to thank my fellow writers for the wonderful experience, in particular the amazing Brianna Marshall for bringing me onto the blog. So long, and thanks for all the fish!