Introduction
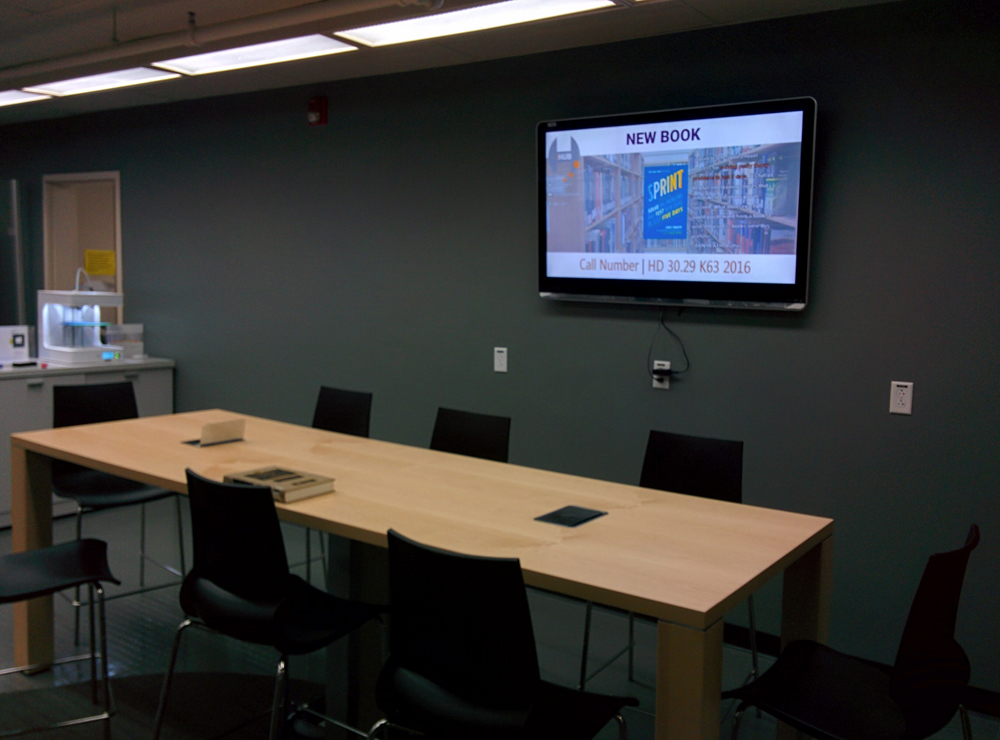
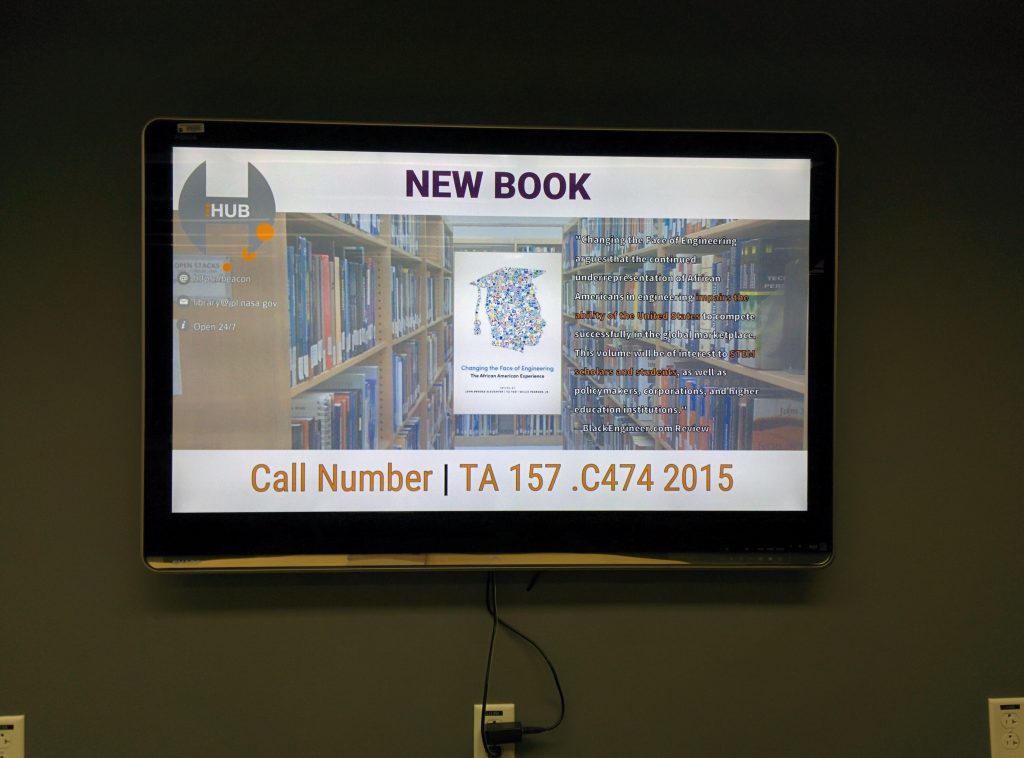
At the JPL Library we recently remodeled our collaborative workspace. This process allowed us to repurpose underutilized televisions into digital displays. Digital displays can be an effective way to communicate key events and information to our patrons. However, running displays has usually required either expensive hardware (installing new cables to tap into local media hosts) or software (Movie Maker, 3rd Party software), sometimes both. We had the displays ready but needed cost effective solutions for hosting and creating the content. Enter Raspberry Pi and a movie creator that can be found in any Microsoft Office Suite purchased since 2010… Microsoft PowerPoint.
In this post I will cover how to select, setup, and install the hardware. The follow up post will go over the content creation aspect.
Hardware Requirements
Displays
Luckily for us, this part took care of itself. If you need to obtain a display, I have two recommendations:
- Verify the display has a convenient HDMI port. You are looking for a port that allows you to discreetly tuck the Raspberry Pi behind the display. Additionally, the port should be easily accessible if the need arises to swap out HDMI cables.
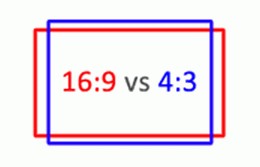
- Opt for a display that is widescreen capable (16:9 aspect ratio). This will provide you with a greater canvas for your content. Whatever aspect ratio you decide upon, make sure your content settings match. This graphic sums up the difference between the aspect ratios of widescreen and standard (4:3 aspect ratio).
Raspberry Pi
Description
There are plenty of blog posts and documentation that cover the basics of what Raspberry Pi is and what is fully capable of. In short, you can think of it as a mini and price effective computer. For this project are interested in its price point, native movie player, and operating system customization prowess.
Selection
Devices
There are three main iterations available for purchase:
- Raspberry Pi Model B+ | $29.95
- Raspberry Pi 2 Model B | $39.95
- Raspberry Pi 3 Model B | $39.95
Obviously I would recommend the Pi 3, which was just released in late February, over the rest. All three are capable of running HD quality videos, but the Pi 3 will definitely run smoother. Also, the Pi 3 has on-board Wi-Fi and Bluetooth connectivity, on previous versions this required purchasing add-ons and used up USB slots.
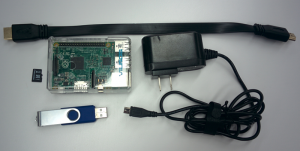
However, these prices are only for the computer itself. You would still need, at the minimum, an SD card to store the operating system and files, power adaptor, keyboard and mouse, and an HDMI cable. The only advantage of selecting the 2 is that there are several pre-selected bundles created by 3rd party sellers that can lower the costs. Make sure to check the bundle details to confirm it contains the Raspberry Pi iteration that you want.
Bundles
Here are some recommended bundles that contain all you need (minus keyboard and mouse) for this project:
- Canakit Raspberry Pi 3 Complete Starter Kit – 32GB Edition | $74.99
Includes: Raspberry Pi 3, 32GB Micro SD Card pre-loaded with NOOBS setup files, USB MicroSD card reader, power supply, case, HDMI cable, and heat sinks. - Vilros Raspberry Pi 3 Media Center Kit | $59.99
Includes: Raspberry Pi 3, 8GB Micro SD Card pre-loaded with NOOBS setup files, power supply, case, HDMI cable, and heat sinks. - CanaKit Raspberry Pi 2 Complete Starter Kit | $69.99
Includes: Raspberry Pi 2, 8GB Micro SD Card pre-loaded with NOOBS setup files, Wi-Fi adapter, power supply, HDMI cable, and heat sink.
Keyboard & Mouse
Most USB keyboards and mice will work with a Pi but opt for simple ones to avoid drawing too much power from it. If you do not have a spare one consider this Bluetooth Keyboard and Mouse Touchpad. The touchpad is a bit wonky but it’ll get the job done and the portability is worth it.
Physical Setup
Getting the Raspberry Pi ready to boot is fairly easy. We just need to plug in the power supply, insert Micro SD Card with the operating system, and attach a display. Granted this all just gets to you a basic screen with the Pi awaiting instructions. A mouse, keyboard, and network connection are pretty much required for setting up the Pi software in order to get the device into a usable state.
Software Setup
The program we use is the Raspberry Pi Video Looper. This setup works exactly how it sounds: the Raspberry Pi plays and loops videos. However, before we can install that we need to get the Raspberry Pi up and running with the latest Raspbian operating system.
Installing Raspbian
Using personal SD
If you decided to use your own SD card, see this guide on how to get up and running.
Using NOOBS
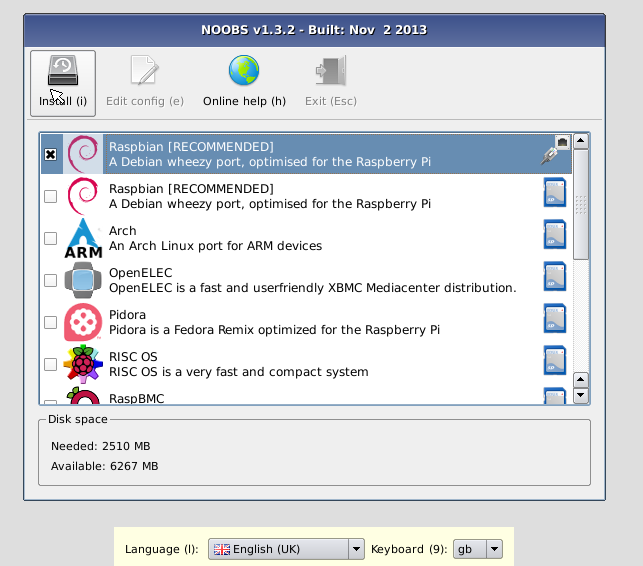
If you bought a bundle, chances are that it came with a Micro SD Card pre-loaded with NOOBS (New Out of Box Software). With NOOBS we can just boot up the Pi and select Raspbian from the first menu. Make sure to also change the Language and Keyboard to your preferred settings, such as English (US) and us.
Once you hit Install, the NOOBS software will do its thing. Grab a cup of coffee or walk the dog as it will take a bit to complete the install. After installation the Pi will reboot and load up Raspi-config to let you adjust settings. There is a wide range of options but the two that should be adjusted right now are:
- Change User Password
- SSH – If you want remote access, you will need to Enable to SSH. For more information on this option see the Raspberry Pi Documentation.
After adjusting the settings, the Pi will boot the desktop environment. Because the NOOBS version loaded onto the card might be dated, the next step is to update the firmware and packages. To do this, click on the start menu and select the terminal and type in the following commands:
- sudo apt-get update
- sudo apt-get upgrade
- sudo rpi-update
- sudo reboot
Once the Pi reboots we can continue to the next phase, installing the video looper.
Installing Video Looper
For a complete guide on installing and adjusting the Video Looper, see Adafruit’s Raspberry Pi Video Looper documentation. In short, the installation process is all but three terminal commands:
- git clone https://github.com/adafruit/pi_video_looper.git
- cd pi_video_looper
- sudo ./install.sh
After a few minutes the install is complete and the Video Looper is good to go! If you do not have any movies loaded your PI will now display “Insert USB drive with compatible movies”. Inserting a USB drive into the Pi will initiate a countdown followed by video playback.
Using Video Looper
Now that the Pi is all set you can load your videos onto an USB stick and the Looper will take care of the rest. The Video Looper is quite versatile and can display movies in the following formats:
- AVI
- MOV
- MKV
- MP3
- M4V
If your Pi fails to read the files on the USB drive, try loading them on another. I had several USB sticks that I went through before it read the files. Sadly, most of the vendor USB stick freebies were incompatible.
Lastly, the Video Looper has a few configuration options that you adjust to best fit your needs. Of those listed in the documentation I would recommend adjusting the file locations (USB stick vs on the Pi itself) and video player. The last one only being relevant if you cannot live with the loop delay between movies.
Unit Install
 After the Video Looper Steup we can now install the unit behind the display. We opted to attach the device using Velcro tape and a 0.3m Flat HDMI cable. Thanks toe the Velcro I can remove and reattach the Pi as needed. The flat HDMI cable reduces the need for cable management . The biggest issue we had was tucking away the extra cable from the power supply, a few well placed Velcro ties corralled the wires into a neat bundle that was easily attached to the back of the television. Velcro, is there anything it can’t solve?
Wrap Up
Well if you’ve made it this far I hope you are on your way to creating a digital display for your institution. In my next post I will cover how we used Microsoft PowerPoint to create our videos in a quick and efficient manner.
The Raspberry Pi is a wonderful device so even if it the Video Looper setup fails to live up to your needs, you can easily find another project for it to handle. May I suggest the Game Boy Emulator?
Pingback: Digital Displays on a Budget: Hardware | Marlon Rodrigo Hernandez
Tony
Have you looked into RiseVision as a content creator and content distributor? It’s free – some add ons and widgets cost money – and we use it to run our digital signage in our Studio. The unit was formerly a FireSign, but with that company pulling out of the market at the end of the year, we needed a low or no cost solution to put into play right away. Their website is https://www.risevision.com/ and it will work on a Raspberry Pi 2 and up.